
In advertising and personalization, vehicle wraps have become increasingly popular. Whether you’re a business looking to promote your brand or an individual seeking a unique design for your car, a well-installed vehicle wrap can be a game-changer. However, achieving a flawless vehicle wrap installation requires precision, patience, and expertise. To help you avoid costly mistakes, here are eight common vehicle wrap installation mistakes to avoid.
Table of Contents
Mistake 1: Neglecting Surface Cleaning and Preparation
Mistake 2: Inaccurate Measuring
Mistake 3: Incorrect Use of Heat Gun
Mistake 4: Inadequate Post-Installation Procedures
Mistake 5: Choosing Low-Quality Materials
Mistake 6: Ignoring Environmental Factors
Mistake 7: DIY Installation Without Expertise
Mistake 8. Neglecting Maintenance
FAQs
Key Takeaways
|
Mistake 1: Neglecting Surface Cleaning and Preparation
Neglecting surface cleaning and preparation is a critical misstep that can have far-reaching consequences when applying vehicle wraps. The importance of starting with a meticulously clean surface cannot be overstated, as it directly impacts the adhesion and overall longevity of the vehicle wrap.
A clean surface ensures a smooth and uniform application, preventing problems such as bubbles or imperfections from dirt, grease, or contaminants beneath the wrap.
Why is a Clean Surface for Vehicle Wraps Important?
- Adhesion: A clean surface promotes optimal adhesion, allowing the vehicle wrap to bond securely and uniformly to the vehicle’s exterior.
- Longevity: Proper surface preparation extends the lifespan of the vehicle wrap, reducing the risk of premature wear, peeling, or deterioration.
- Aesthetic Appeal: A clean surface enhances the visual appeal of the vehicle wrap, ensuring a professional and polished finish.
- Durability: Contaminants on the surface can compromise the wrap’s durability over time, diminishing the protective barrier for the vehicle’s original paint.
Steps for Effective Surface Preparation
- Thorough Washing: Begin with a comprehensive wash to remove dust, dirt, and grime from the vehicle’s surface.
- Focus on Problem Areas: Pay special attention to areas prone to contaminants, such as seams, handles, and mirrors.
- Drying Process: Allow the vehicle to dry completely to prevent moisture-related issues during the wrap application.
- Use of Recommended Solvents: Employ suitable solvents, like isopropyl alcohol, to eliminate any remaining residues or contaminants.
- Surface Inspection: Conduct a final inspection to ensure the surface is smooth, dry, and debris-free before proceeding with the vehicle wrap application.
Prioritizing thorough preparation sets the stage for a successful and enduring application, enhancing the vehicle wrap’s aesthetic and functional aspects.
Mistake 2: Inaccurate Measurement
Inaccurate measuring stands out as a significant mistake in vehicle wraps, and its consequences can lead to a cascade of issues throughout the installation process. Precise measurements are pivotal for achieving a seamless, professional-looking wrap that accurately fits the vehicle’s contours. When measurements are inaccurate, several adverse consequences may arise, including misalignment of graphics, distorted images, and excessive material waste.
One of the primary consequences of inaccurate measuring is the misfitting of vehicle wraps. Ill-fitting wraps not only compromise the visual aesthetics but also diminish the overall effectiveness of the wrap, potentially distorting key design elements or brand messaging. Moreover, inaccuracies can lead to unnecessary material wastage, increasing project costs and environmental impact.
To avoid the pitfalls associated with inaccurate measurements in vehicle wraps, consider the following tips for achieving precision:
- Use High-Quality Measuring Tools: To ensure dimension accuracy, Utilize reliable measuring tools, such as tape measures or laser measuring devices.
- Measure Multiple Times: Double-check measurements to eliminate human error. Repeat measurements at different points to verify consistency.
- Account for Contours and Curves: Recognize the three-dimensional nature of vehicles and adjust measurements accordingly to accommodate curves, edges, and irregularities.
- Document and Label Measurements: Keep a detailed record of measurements for each vehicle section and label them appropriately.
- Consider Design Elements: Factor in the design elements and layout during measurements to ensure proper alignment and symmetry.
Implementing precise measurements enhances the wrap’s visual appeal. It contributes to a more efficient use of materials and resources in the installation process.
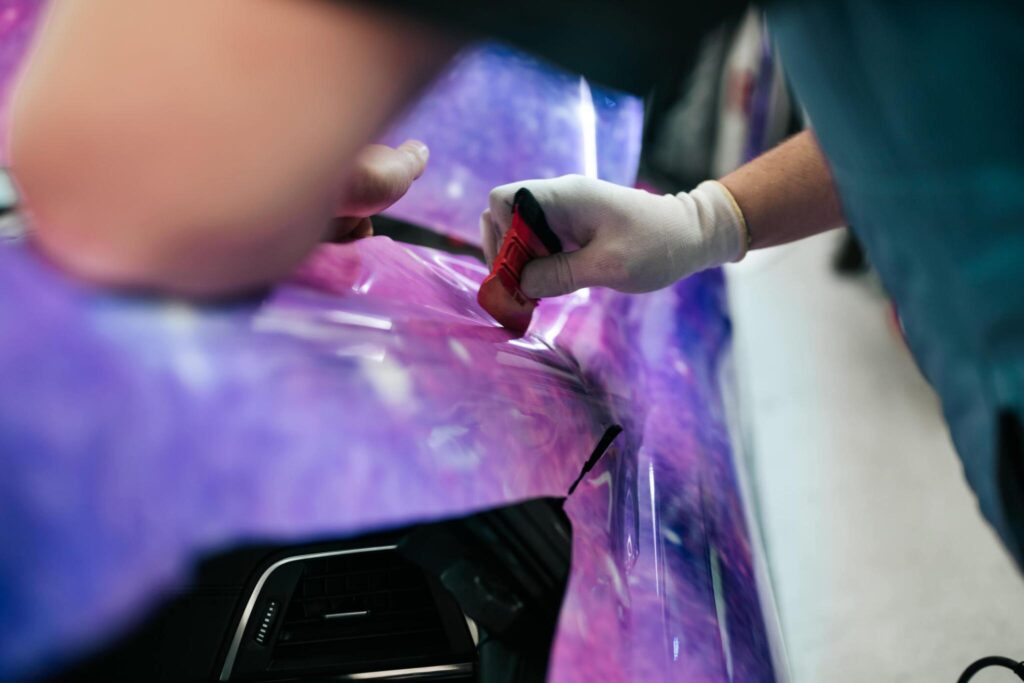
Mistake 3: Incorrect Use of Heat Gun
Incorrect use of a heat gun during the vehicle wrap installation is a common mistake that can lead to various issues, including damage to the wrap material and an uneven application. Applying heat is crucial for activating the adhesive, allowing the wrap to conform smoothly to the vehicle’s contours.
Here’s a detailed overview of the correct heat gun techniques, along with alternatives and precautions for effective vehicle wraps:
Proper Heat Gun Techniques for Vehicle Wraps
- Maintain Optimal Distance: To prevent overheating and potential damage, Keep the heat gun at an optimal distance, typically 6 to 12 inches from the wrap surface.
- Even Heat Distribution: Move the heat gun evenly across the surface to ensure consistent heat distribution. Focus on one section at a time to achieve uniform adhesion.
- Controlled Temperature: Adjust the heat gun temperature to a moderate level, avoiding excessive heat that can cause the wrap to melt or deform.
- Use a Squeegee: Simultaneously, use a squeegee while applying heat to aid the wrap’s conformability and smooth out any air bubbles or wrinkles.
- Work in Sections: Divide the vehicle into manageable sections, gradually applying heat and smoothing the wrap to achieve a seamless finish.
Alternatives and Precautions
- Infrared Lamps: In addition to heat guns, infrared lamps can provide consistent and controlled heat, offering an alternative for large or intricate surfaces.
- Avoid Overstretching: Overstretching the wrap with excessive heat can lead to distortion and compromise the material’s integrity. Exercise caution to prevent this.
- Test on Scrap Material: Before applying heat to the vehicle wrap, practice on a scrap piece to familiarize yourself with the heat gun’s settings and their impact on the material.
- Monitor Surrounding Temperature: Extreme temperatures, either too hot or too cold, can affect the wrap’s adhesive properties. Ensure a moderate ambient temperature during installation.
- Professional Training: For intricate wraps or complex vehicle shapes, consider professional training to master heat gun techniques and achieve optimal results.
Mistake 4: Inadequate Post-Installation Procedures
Inadequate post-installation procedures are a common oversight in the application of vehicle wraps, and neglecting these crucial steps can impact the longevity and appearance of the wrap. Proper post-installation care involves essential processes such as curing and post-heating, each playing a significant role in ensuring the durability and quality of the wrap.
Why is Curing and Post-Heating for Vehicle Wraps Important?
- Curing Time: Allowing the vehicle wrap to undergo curing is vital. This involves giving the adhesive sufficient time to bond with the vehicle’s surface, enhancing overall adhesion and durability.
- Post-Heating Benefits: Post-heating, or heat curing, is essential for activating the adhesive and aiding the wrap’s conformability. This step ensures that the wrap adheres uniformly to the vehicle’s contours, reducing the risk of premature peeling or lifting.
Recommended Post-Installation Care for Vehicle Wraps
- Avoid Immediate Exposure: After installation, avoid exposing the wrapped vehicle to harsh environmental elements, such as extreme heat or inclement weather, for a specified period for proper curing.
- Gentle Cleaning Practices: Use mild, soapy water and a soft cloth or sponge when cleaning the wrapped vehicle. Avoid harsh chemicals or abrasive materials that may damage the wrap.
- Post-Heating Techniques: If post-heating is required, use a heat gun or infrared lamp at a controlled temperature. Apply heat evenly across the wrap surface, focusing on edges and seams.
- Regular Inspection: Periodically inspect the vehicle wrap for any signs of wear, lifting, or damage. Promptly address any issues to prevent further deterioration.
- Avoid Waxing for a Certain Period: Refrain from waxing the vehicle wrap immediately after installation, as this can interfere with the curing process. Consult with professionals for specific recommendations on when to resume waxing.

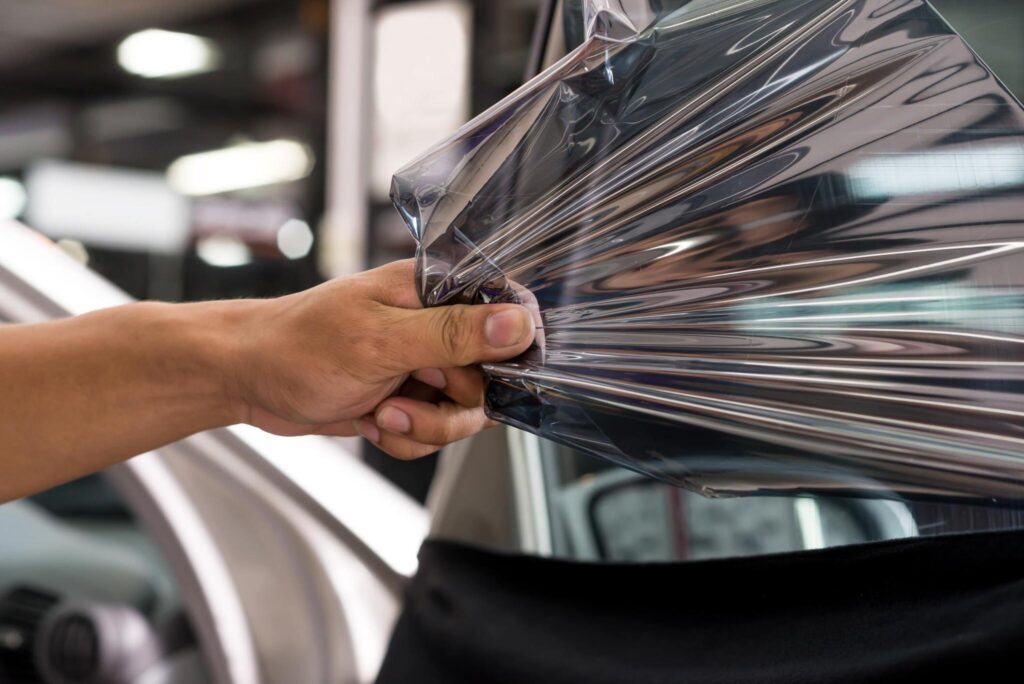
Mistake 5: Choosing Low-Quality Materials
Choosing low-quality materials for vehicle wraps can harm their longevity and overall performance. Inferior materials may lack durability, leading to premature wear, fading, and a compromised appearance. Inadequate adhesives in low-quality wraps may result in poor adhesion, increasing the risk of peeling, bubbling, or lifting.
Moreover, low-quality materials may struggle to withstand environmental factors such as UV exposure, extreme temperatures, and harsh weather conditions, further accelerating deterioration. Opting for high-quality materials best protects the investment in a vehicle wrap, ensuring a longer-lasting and visually appealing result.
How to Select the Right Materials for Vehicle Wraps
- Choose Reputable Suppliers: Source materials from reputable suppliers or manufacturers with a proven track record in providing high-quality vehicle wrap materials.
- Consider Vinyl Quality: Prioritize vinyl with UV-resistant properties to protect against color fading and deterioration caused by prolonged sun exposure.
- Examine Adhesive Strength: Assess the adhesive quality to ensure robust and long-lasting adhesion to the vehicle’s surface. This minimizes the risk of peeling or lifting.
- Check for Certification: Verify if the materials are certified by industry standards or organizations, ensuring they meet quality benchmarks for vehicle wraps.
- Evaluate Finish Options: Select finishes such as gloss, matte, or satin based on aesthetic preferences. Consider how each finish impacts the material’s durability.
- Inquire About Warranty: Opt for materials with a manufacturer’s warranty, providing quality assurance and protection against potential defects.
- Consider Environmental Resistance: Choose materials to withstand various environmental factors, including UV rays, extreme temperatures, and chemical exposure.
- Review Customer Feedback: Research customer reviews and feedback on specific materials or brands to gauge real-world performance and satisfaction levels.
Investing in premium materials safeguards the integrity of the wrap and enhances the overall branding and messaging impact on the wrapped vehicle.
Mistake 6: Ignoring Environmental Factors
Ignoring environmental factors during the installation of vehicle wraps can lead to various challenges and compromise the overall quality of the wrap. Weather conditions, such as extreme temperatures, high humidity, or precipitation, can significantly impact the adhesive properties of the wrap material.
Additionally, exposure to environmental pollutants, UV rays, and airborne contaminants may contribute to premature wear, fading, or degradation of the wrap over time. Addressing these factors ensures a successful and long-lasting vehicle wrap installation.
Best Practices for Different Environmental Conditions
Hot Weather
- Work in Shaded Areas: Avoid installing vehicle wraps directly under the scorching sun. Choose shaded areas to prevent the wrap material from overheating.
- Adjust Installation Speed: In hot weather, work efficiently to apply the wrap promptly, minimizing the adhesive’s exposure time to high temperatures.
Cold Weather
- Preheat Material: Warm up the vehicle wrap material before installation to improve its flexibility and ease of application.
- Extend Curing Time: Allow additional time for the wrap to cure in colder temperatures, ensuring proper adhesion and bonding.
High Humidity
- Use Dehumidifiers: Control humidity levels in the workspace by employing dehumidifiers, reducing the risk of moisture-related issues during installation.
- Ensure Thorough Drying: In humid conditions, ensure that the vehicle and wrap material are thoroughly dry before application.
Rain or Wet Conditions
- Choose Indoor Spaces: Whenever possible, opt for indoor spaces for vehicle wrap installations during rainy conditions to prevent water-related issues.
- Thorough Drying: If outdoor installation is unavoidable, ensure the vehicle is completely dry before applying the wrap, and use additional drying methods if necessary.
UV Exposure
- Select UV-Resistant Materials: Choose vehicle wrap materials with UV-resistant properties to protect against sun damage and color fading.
- Apply UV Protective Overlaminate: Consider adding a UV-protective laminate over the wrap for extra defense against UV rays.
Adapting to different circumstances enhances the resilience of the vehicle wrap against environmental challenges.

Mistake 7: Attempting DIY Installation Without Proper Knowledge
While the allure of cost savings may prompt individuals to attempt a DIY installation of vehicle wraps, seeking professional help is crucial to avoid the pitfalls associated with inexperience. Professional installers in Danbury, CT, like Car Wrap – Illmatic Wraps, CT, bring a wealth of expertise and skills that significantly enhance the quality and durability of the vehicle wrap.
It’s advisable to seek professional help when:
- Complex Designs: Elaborate or intricate designs may require professional expertise to ensure precise alignment and application, especially on irregular vehicle surfaces.
- Lack of Experience: Individuals with no prior experience in vehicle wrap installations are more likely to encounter challenges that can be mitigated by hiring professionals.
- Specialized Vehicles: Professional installers have the knowledge to navigate and apply wraps seamlessly for vehicles with unique features or challenging contours.
- Time Constraints: Professionals can complete installations efficiently, saving time and ensuring a timely and well-executed project.
- Quality Assurance: Professional installers provide quality assurance, backed by their experience and often by warranties, giving peace of mind to the client.
Risks of DIY for Vehicle Wraps
- Adhesion Issues: Inexperienced individuals may need help achieving proper adhesion, which can lead to peeling, bubbling, or uneven application.
- Improper Alignment: Aligning graphics and maintaining symmetry can be challenging without expertise, resulting in a visually unappealing wrap.
- Waste of Material: DIY attempts often lead to material wastage due to mistakes, potentially increasing overall project costs.
- Difficulty Handling Wrinkles: Addressing wrinkles, creases, or air bubbles without the necessary skills can be challenging, affecting the wrap’s finish.
Mistake 8. Neglecting Maintenance
Neglecting maintenance is a significant oversight that can compromise vehicle wraps’ longevity and visual appeal. Proper maintenance is essential to preserve the wrap’s integrity, protect against environmental factors, and ensure that it continues to convey its message effectively.
Routine care helps prevent issues such as fading, peeling, or damage, ultimately extending the lifespan of the vehicle wrap.
Maintenance Tips for Vehicle Wraps
- Regular Cleaning: Wash the vehicle wrap regularly with a mild detergent and a soft sponge or cloth to remove dirt, grime, and pollutants.
- Avoid Harsh Chemicals: Avoid using abrasive cleaners or harsh chemicals that may damage the wrap’s surface or compromise its color vibrancy.
- Gentle Pressure Washing: If using a pressure washer, maintain a gentle pressure and keep a reasonable distance to prevent potential damage to the wrap.
- Handle Wrinkles Promptly: Address any wrinkles or bubbles promptly by applying gentle heat and smoothing them out with a squeegee.
- Avoid Scratches: Be cautious around abrasive surfaces, and avoid parking near objects or structures that could scratch or damage the vehicle wrap.
https://www.youtube.com/watch?v=cfEMJ86GMVI
FAQs
Are there any restrictions or regulations for vehicle wraps?
Vehicle wrap regulations vary by location, and checking with local authorities is essential. Some areas may restrict the colors, designs, or content of wraps to ensure they comply with traffic safety and community standards. Always confirm compliance with local regulations before proceeding with a vehicle wrap.
Can I change the design of my vehicle wrap after it’s been applied?
While changing a vehicle wrap design is technically possible, it is not simple. Removing or altering a wrap can be labor-intensive and may not always guarantee a seamless result. Finalizing and approving the design before the wrap is applied is generally recommended to save time and resources.
Can a vehicle wrap be applied over existing paint or graphics?
In most cases, vehicle wraps can be applied over existing paint or graphics, provided the surface is smooth and without significant imperfections. However, for optimal results, removing any existing graphics, decals, or uneven paint layers is often recommended before applying a new wrap. It ensures a smoother application and enhances the longevity of the new wrap.
Are there any color limitations for vehicle wraps?
Vehicle wraps come in various colors, allowing for diverse and creative designs. There are typically no strict color limitations, but it’s essential to consider the visibility of the design on the chosen vehicle color. Contrast and legibility are crucial factors to ensure the effectiveness of the wrap. Work closely with your designer to select colors that make your message or branding stand out.
Can I wrap a leased vehicle, and what are the considerations for removal at the end of the lease?
You can wrap a leased vehicle, but checking the lease agreement for any specific restrictions or requirements is crucial. When it comes to removal at the end of the lease, a professional service is advisable to ensure the wrap is removed without damaging the vehicle’s original paint, meeting lease return guidelines. Professional removal preserves the vehicle and helps maintain a positive relationship with the leasing company.
Achieve Seamless Perfection with Car Wrap – Illmatic Wraps CT!
Achieving a flawless vehicle wrap installation is essential for a stunning and long-lasting result. Car Wrap – Illmatic Wraps CT is your trusted partner in this journey, offering expert guidance and professional services to ensure your vehicle wrap stands out on the road. By avoiding common mistakes, prioritizing high-quality materials, and seeking professional expertise, you can transform your vehicle into a captivating statement. Trust in Illmatic Wraps CT to help you capture attention and make a bold impression with your vehicle wrap. Drive with confidence and style, knowing you’ve chosen the best in the business.
