Ceramic coating is a popular method in Danbury, CT, to protect your car’s paint, offering a long-lasting shield against dirt, water, and UV rays. This advanced solution creates a semi-permanent bond with the paint, providing a robust, glossy finish that enhances the vehicle’s appearance. However, proper preparation is essential to ensure the best results, as any imperfections or contaminants can compromise the coating’s effectiveness. By following a meticulous preparation process, you can maximize the durability and performance of the ceramic coating, ensuring your car looks pristine for years to come.
Table of Contents
Key Takeaways
What is Ceramic Coating for Car
Step-by-Step Guide to Preparing Your Car for Ceramic Coating
1. Wash Your Car Thoroughly
2. Decontaminate the Paint
3. Correct Paint Imperfections
4. Polish the Car
5. Remove All Residue
6. Protect Non-Painted Surfaces
7. Ensure the Car is Completely Dry
Frequently Asked Questions
Get Expert Ceramic Coating at Car Wrap – Illmatic Wraps CT!
| Key Takeaways ✔ Clean your car thoroughly to remove dirt and grime before applying ceramic coating. ✔ Use a clay bar and iron remover to eliminate surface contaminants for a smooth application. ✔ Fix scratches and imperfections using a dual-action polisher to ensure the coating enhances the paint. ✔ Polish the car for clarity and use an IPA solution to remove any leftover residue. ✔ Cover non-painted surfaces with masking tape to prevent accidental coating. ✔ Ensure the car is completely dry and prepare a clean workspace to avoid contamination during coating application. |

What is Ceramic Coating for Car
Ceramic coating is a liquid polymer applied to a car’s exterior. When applied, it chemically bonds with the vehicle’s factory paint, creating a protective layer.
Here are a few things you need to know about ceramic coating in Danbury, CT:
Protection from Elements
Ceramic coating provides a durable shield against UV rays, chemicals, bird droppings, and other contaminants that can damage the car’s paint. This protective layer helps prevent oxidation and fading caused by sun exposure, keeping the car’s paint looking new for longer. Additionally, it acts as a barrier against acidic substances like acid rain, which can etch into the paint if left untreated.
Hydrophobic Properties
The coating repels water and other liquids, making the car easier to clean and less prone to water spots. This hydrophobic effect promotes dropwise condensation, repels impinging water droplets, and sustains hydrophobicity, which causes water to bead up and roll off the surface. It keeps the car cleaner between washes and reduces the risk of water spots and mineral deposits that can occur when water evaporates on the paint.
Enhanced Appearance
Ceramic coatings enhance the car’s gloss and depth, making the paint look more vibrant and polished. The coating creates a mirror-like finish that highlights the car’s color and design, giving it a showroom-quality shine. This enhanced appearance can make the car look newer and more attractive, adding to its overall value and appeal.
Longevity
Unlike traditional wax, which wears off quickly, ceramic coatings can last for several years with proper maintenance. High-quality ceramic coatings can protect the car for 2-5 years, depending on the product and how well the car is maintained. This long-lasting protection means less frequent reapplications than wax, saving time and effort in the long run.
Scratch Resistance
While not completely scratch-proof, ceramic coating offers a higher level of scratch resistance compared to uncoated paint. The coating creates a hard layer that can withstand minor abrasions and swirl marks caused by washing and drying. However, it’s important to note that ceramic coating cannot prevent deeper scratches from accidents or intentional damage.
Ease of Cleaning
The slick surface created by the ceramic coatings makes dirt and grime harder to stick to, simplifying the cleaning process. This means that even stubborn contaminants like bird droppings and tree sap are easier to remove without harsh scrubbing. Regular maintenance typically involves gentle washing with a pH-neutral shampoo, reducing the time and effort required to keep the car looking its best.

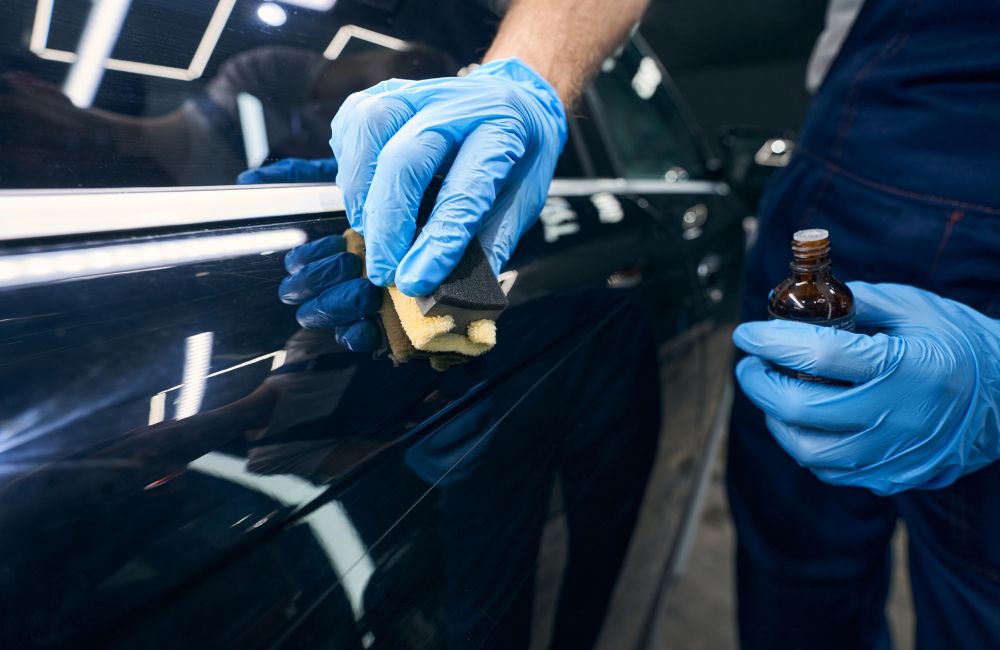
Step-by-Step Guide to Preparing Your Car for Ceramic Coating
Ceramic coating is a game-changer for car enthusiasts, offering unmatched protection and a stunning shine that lasts for years. However, the secret to a flawless ceramic coating application lies in meticulous preparation. Whether you’re a DIYer or planning to do it professionally, understanding the preparation process can make all the difference.
Here is a quick and easy guide to ensure your car is perfectly prepped and ready for that sleek, ceramic finish.
1. Wash Your Car Thoroughly
Preparing your car for ceramic coating starts with a thorough wash. This crucial first step ensures the surface is clean and free from contaminants, setting the stage for a successful ceramic coating application.
Here are some tips to help you wash your car effectively before applying ceramic coating.
Use High-Quality Car Wash Soap
Opt for a pH-balanced car wash soap specifically designed for automotive use. This soap removes dirt and grime without stripping away wax or sealant. Avoid using household detergents, as they can be too harsh and damage your car’s paint.
Employ the Two-Bucket Method
Use one bucket for soapy water and another for rinsing your wash mitt. This method helps prevent dirt from being reintroduced to the car’s surface, reducing the risk of scratches. Always rinse the wash mitt in the clean water bucket before dipping it back into the soapy water.
Use a Microfiber Wash Mitt
A microfiber wash mitt is gentle on the paint and effective at picking up dirt particles. Unlike sponges, which can trap dirt and cause scratches, microfiber mitts provide a safer and more thorough cleaning. Make sure to wash the mitt regularly to avoid accumulating too much dirt.
Clean from Top to Bottom
Start washing from the top of the car and work your way down. This technique ensures that dirty water flows downward, preventing re-contamination of already cleaned areas. Pay special attention to lower sections, which typically accumulate more grime and road debris.
Rinse Thoroughly and Dry
After washing, rinse the car thoroughly with clean water to remove all soap residue. Use a high-pressure hose or a dedicated rinse bucket for this step. Dry the car immediately with a microfiber drying towel to prevent water spots and prepare the surface for the next steps in the ceramic coating process.
2. Decontaminate the Paint
Decontaminating your car’s paint is a vital step in preparing for ceramic coating. This process removes bonded contaminants that washing alone can’t eliminate, ensuring a smooth and clean surface for the coating to adhere to. Here are some key tips for effectively decontaminating your car’s paint.
Use a Clay Bar Kit
A clay bar kit removes surface contaminants like tree sap, tar, and industrial fallout. Gently glide the clay bar over lubricated paint surfaces to lift these particles without scratching the paint. This step leaves the surface smooth, enhancing the bonding of the ceramic coating.
Apply an Iron Remover
Iron particles from brake and rail dust can embed into your car’s paint and cause rust spots. Spraying an iron remover onto the paint helps dissolve these particles, turning them into a water-soluble solution that can be rinsed. This ensures that all embedded contaminants are eliminated before applying the ceramic coating.
Work in Small Sections
When decontaminating the paint, it’s best to work in small sections to ensure thoroughness. This allows you to focus on each area, ensuring that all contaminants are removed. Completing one section at a time also helps prevent the decontamination products from drying out on the surface.
Use a Detailing Spray for Lubrication
While using a clay bar, always pair it with a detailing spray for lubrication. This prevents the clay bar from sticking to the paint and reduces the risk of scratching. Keep the surface well-lubricated to ensure the clay bar glides smoothly and effectively picks up contaminants.
Rinse and Dry Thoroughly
After decontaminating each section, rinse the area thoroughly with clean water to remove any remaining residue from the clay bar and iron remover. Dry the car with a microfiber towel to prevent water spots and prepare the surface for the next steps in the ceramic coating process.
3. Correct Paint Imperfections
Correcting paint imperfections is crucial in preparing your car for ceramic coating. Addressing issues like scratches, swirl marks, and oxidation ensures that the coating bonds properly and looks flawless. Here are some essential tips to help you correct paint imperfections effectively.
Inspect the Paint Thoroughly
Start by carefully inspecting your car’s paint under good lighting conditions. Look for scratches, swirl marks, and areas of oxidation. Using a flashlight or a dedicated paint inspection light can help you identify even the smallest imperfections that need attention.
Use a Dual-Action Polisher
A dual-action polisher is a versatile tool that helps remove imperfections without the risk of burning the paint. Combine it with appropriate cutting and polishing compounds to address various levels of scratches and swirl marks. This tool ensures even pressure and movement, making it safer for beginners and effective for experienced users.
Select the Right Polishing Compounds
Choose polishing compounds based on the severity of the imperfections. Start with a more aggressive cutting compound for deep scratches and heavy oxidation. Follow up with a finer polish to restore clarity and gloss. Using the right products ensures effective correction without causing further damage.
Check Your Progress Frequently
Regularly check your progress by wiping down the area with a microfiber cloth and using an inspection light. This helps you see if the imperfections are being removed and if additional passes are needed. Frequent checks prevent over-polishing and ensure a consistent, high-quality finish.
4. Polish the Car
Polishing your car is a key step in the preparation process for ceramic coating. This step enhances the paint’s clarity and gloss, ensuring a smooth surface for the coating to bond effectively. Here are some essential tips to help you polish your car properly.
Choose the Right Polishing Pad and Compound
The appropriate polishing pad and compound is crucial for achieving the best results. Use a softer pad and a fine polish for minor imperfections and enhancing gloss. For more significant defects, start with a medium-cut pad and compound, then finish with a softer pad and fine polish to restore clarity.
Use a Dual-Action Polisher
A dual-action polisher is recommended for polishing as it provides even pressure and reduces the risk of damaging the paint. It oscillates in multiple directions, making it safer and more effective at removing imperfections. Ensure you keep the polisher moving steadily to avoid concentrating too much heat in one spot.
Apply Even Pressure and Overlapping Passes
When polishing, apply even pressure and use overlapping passes to ensure complete coverage. This technique helps achieve a uniform finish and reduces the chances of leaving behind unpolished spots. Overlapping passes ensure that each part of the section is polished multiple times for maximum effect.
Wipe Down and Inspect Your Work
After polishing each section, wipe down the area with a clean microfiber cloth to remove any residue. Inspect your work under good lighting to ensure the desired level of clarity and gloss has been achieved. If necessary, repeat the process in areas that require additional polishing to achieve a flawless finish.
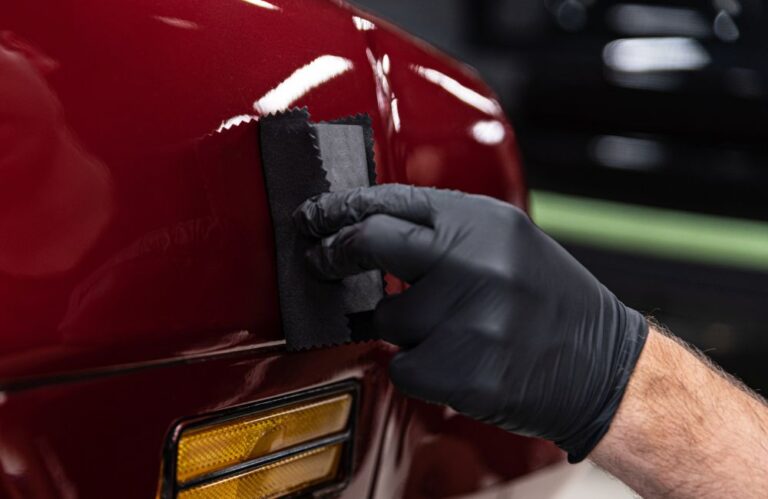
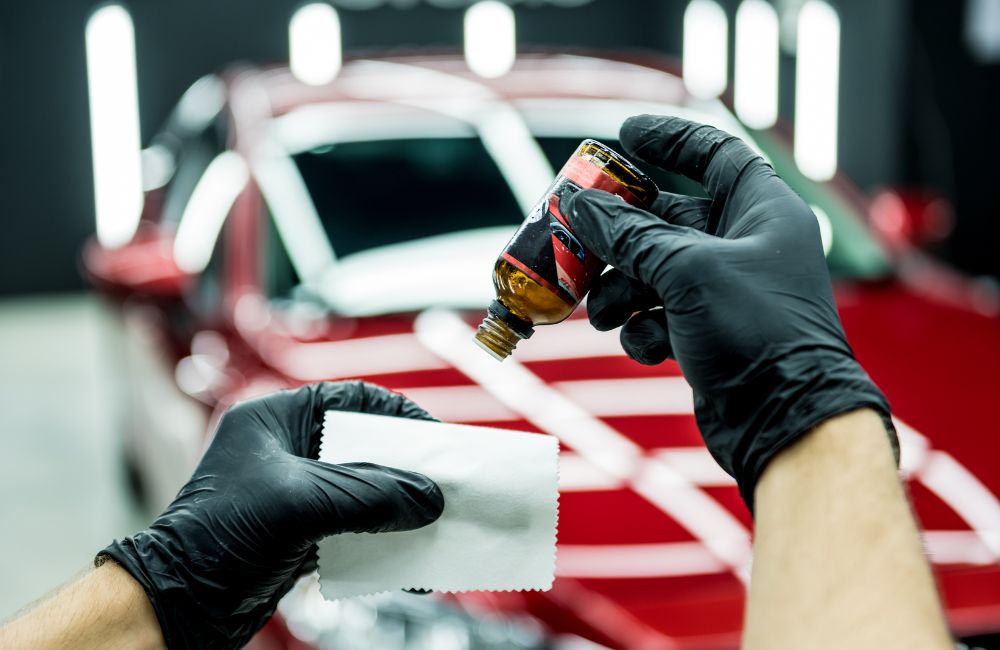
5. Remove All Residue
After polishing your car, removing all residue is essential to ensure the ceramic coating adheres properly. Any leftover polishing compounds or oils can interfere with the coating’s bonding process. Here are some tips to effectively remove all residue from your car’s surface.
Use an Isopropyl Alcohol (IPA) Solution
An IPA solution effectively breaks down and removes polishing oils and residues. Mix a solution of 70% isopropyl alcohol with water in a spray bottle. Spray it onto the surface and wipe it down with a clean microfiber cloth to ensure a residue-free finish.
Use Multiple Microfiber Cloths
Use multiple microfiber cloths to avoid reintroducing residues to the car’s surface. When one cloth becomes saturated, switch to a fresh one. This ensures that you’re always wiping the surface with a clean cloth, enhancing the effectiveness of the residue removal.
Inspect Under Good Lighting
After wiping down each section, inspect the surface under good lighting to ensure all residues are gone. Proper lighting helps you see any remaining streaks or spots that need further attention. This step is crucial for achieving a completely clean surface ready for ceramic coating.
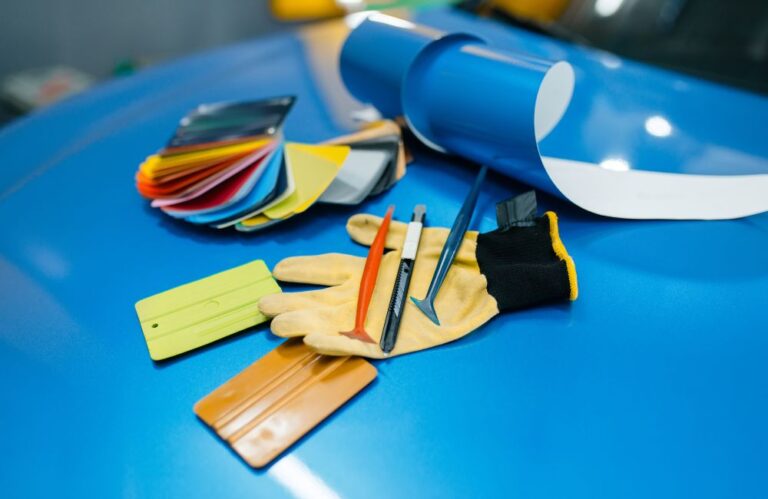
6. Protect Non-Painted Surfaces
When preparing your car for ceramic coating, it’s important to protect non-painted surfaces such as trim, rubber, and plastic components. These areas can be adversely affected by the coating if not properly shielded. Here are some tips to help you protect these surfaces effectively.
Use Masking Tape
Apply masking tape to the edges of non-painted surfaces like trim, rubber seals, and plastic components. This prevents the ceramic coating from accidentally getting on these areas, which can cause discoloration or other issues. Ensure the tape is securely applied to create a clean barrier.
Cover Large Areas with Plastic Sheeting
For larger sections, such as plastic bumpers or headlights, use plastic sheeting or painter’s tape to cover and protect them. This method provides a larger shield and is ideal for areas that can’t be easily covered with just tape. Secure the edges of the sheeting to prevent it from moving during the coating process.
Pay Attention to Door Handles and Badges
Door handles and badges are often overlooked but can be affected by ceramic coating. Carefully tape around these areas to protect them. This ensures that no coating residue ends up on these parts, which can be difficult to remove once dried.
Check for Secure Adhesion
After applying masking tape and plastic sheeting, double-check to ensure they are securely adhered to the surfaces. Loose tape or sheeting can shift and expose the areas you are trying to protect. Smooth down all edges to create a tight seal.
7. Ensure the Car is Completely Dry
Ensuring your car is completely dry is critical before applying ceramic coating. Any moisture left on the surface can interfere with the coating’s adhesion and effectiveness. Here are some essential tips to ensure your car is thoroughly dried.
Use Microfiber Towels
After washing and rinsing your car, dry the surface with high-quality microfiber towels. Microfiber towels are highly absorbent and gentle on the paint, reducing the risk of scratches. Make sure to change towels frequently to avoid spreading moisture.
Employ Air Blowers
Utilize air blowers or compressed air to blow water out of crevices and hard-to-reach areas. This is especially useful for drying around trim, mirrors, and emblems where water tends to accumulate. Air blowers ensure that no water is left behind, even in tight spots.
Work in a Controlled Environment
Dry your car in a shaded, dust-free environment to prevent water spots and contaminants from settling on the wet surface. Avoid direct sunlight, which can cause water to evaporate too quickly, leaving mineral deposits behind. An enclosed garage is ideal for controlling the drying environment.
Inspect for Hidden Moisture
After the initial drying, inspect the car for hidden moisture, especially around door seals, trunk seams, and under the hood. Use a dry microfiber towel to wipe any remaining water. This thorough check ensures that no moisture interferes with the ceramic coating application..
Allow Time for Air Drying
After using towels and air blowers, give the car some time to air dry completely. This extra step ensures that all remaining moisture evaporates. Be patient and ensure the surface is fully dry before proceeding with the ceramic coating.
Frequently Asked Questions
Should I wax my car before applying ceramic coating?
No, you should not wax your car before applying ceramic coating. Wax can interfere with the ceramic coating’s bonding process, preventing it from adhering properly to the paint. Instead, thoroughly clean, decontaminate, and polish the car’s surface to ensure it is completely free of any wax, oils, or residues before applying the ceramic coating.
What not to do with ceramic coatings?
Avoid using abrasive cleaners or polishes, harsh chemicals, and automated car washes with brushes, as they can damage the coating. Don’t park under trees or near construction sites to prevent exposure to sap, bird droppings, and dust. Regular maintenance is essential—wash with pH-neutral shampoos and use maintenance sprays to preserve the coating’s effectiveness.
How long do ceramic coatings last?
Ceramic coatings can last anywhere from 2 to 5 years, depending on the quality of the product and how well the car is maintained. When applied correctly and cared for with regular washing and maintenance, high-quality ceramic coatings can provide long-lasting protection and shine. Environmental factors and usage patterns also play a role in the longevity of the coating.
Get Expert Ceramic Coating at Car Wrap – Illmatic Wraps CT!
Enhance your vehicle’s look and protection with Car Wrap – Illmatic Wraps CT! Our expert team in Danbury, CT, specializes in high-quality ceramic coating applications to give your car the ultimate finish. Contact us today to schedule your appointment and transform your car into a masterpiece. Elevate your ride with Car Wrap – Illmatic Wraps CT!