Vinyl car wraps have become an increasingly popular choice among enthusiasts and businesses. These vibrant and customizable wraps add a touch of personality to your vehicle and serve as a protective layer against the harsh elements. However, like any other aspect of your car’s exterior, car wraps are not immune to wear and tear. The question arises: Can you repair a damaged car wrap?
Assessing the Damage
Assessing the extent and severity of damage to your car wrap is crucial in the repair process. Whether you plan to address the damage yourself or seek professional assistance for car wrap repair, a thorough assessment will help you make informed decisions.
Visual Examination
Conducting a visual examination is the first step in assessing car wrap damage. This initial assessment lets you understand the damage’s location, type, and extent. Here’s how to perform a visual inspection:
- Well-Lit Area: Examine your car wrap in a well-lit area to ensure you can clearly see any imperfections, such as scratches, scuffs, tears, or discoloration.
- Systematic Approach: Start from one end of the vehicle and methodically inspect each section, moving logically. This approach ensures that you don’t miss any damage.
- Note the Location: Use a mental or physical note to document the damage locations as you identify them. This documentation will be valuable for future reference.
- Photographic Evidence: Consider taking clear photographs of the damaged areas. These photos serve as visual references and may be helpful when discussing the damage with professionals or insurance providers.
Professional Assessment
While a visual examination is a valuable starting point, it may not comprehensively understand the damage’s severity, especially for tears, punctures, or underlying issues.
Seeking a professional assessment is advisable, especially when dealing with complex damage or uncertain about the best course of action. A professional assessment typically involves the following steps:
- Expertise: Professional car wrap installers in Danbury, CT, like Car Wrap – Illmatic Wraps, CT, have extensive experience working with car wraps and can quickly assess the extent of damage.
- Specialized Tools: Professionals often use magnifying glasses, light booths, and surface analysis equipment to accurately identify and measure damage.
- Detailed Report: After the assessment, a professional may provide you with a detailed report outlining the type and extent of damage, along with recommendations for repair or replacement.
Documenting Damage
Documenting car wrap damage is essential for several reasons. Whether you plan to file an insurance claim, monitor the progress of DIY repairs, or provide information to a professional repair service, thorough documentation is key.
Why Documentation Matters
Insurance Claims: If your car wrap damage is covered by your insurance policy, clear documentation of the damage is crucial when filing a claim. Insurance providers often require evidence of the damage to process your claim efficiently.
- DIY Repairs: When attempting DIY repairs, documenting the initial state of the damage helps you track progress and ensure that the repairs are successful.
- Professional Assistance: When seeking professional repair services, providing clear documentation allows the professionals to understand the scope of work required and provide accurate estimates.
- Resale Value: If you plan to sell your vehicle in the future, having documentation of past repairs and the condition of the car wrap can enhance its resale value.
Taking Clear Photographs
Before fixing a car wrap fail, documentation matters. Photographs are a powerful tool for documenting car wrap damage. Follow these guidelines to capture clear and informative images:
- Good Lighting: Ensure that the area you photograph is well-lit to capture details effectively.
- Multiple Angles: Take photographs from various angles to comprehensively view the damage.
- Close-Ups: Capture close-up shots highlighting specific imperfections, such as scratches or tears.
- Before and After: If you’re planning to repair the damage, take before-and-after photos to demonstrate the effectiveness of the repair process.
- Consistent Framing: Maintain consistent framing and focus in your photographs to facilitate easy comparison.
- Date and Time: It’s a good practice to include the date and time stamp on your photos to establish a timeline of the damage.
- Location Markers: Include markers in the photos that indicate the damage’s location on the vehicle.
Following these documentation guidelines gives you a comprehensive record of the car wrap damage, which can be invaluable in various situations.
Sample Documentation Checklist
To help you document car wrap damage effectively, consider creating a checklist that includes the following information:
- Date and time of assessment
- Description of the damage (e.g., surface scratches, tears, fading)
- Location of the damage on the vehicle
- Size and dimensions of damage (measure if necessary)
- The severity of the damage (mild, moderate, severe)
- Number of damaged areas
- Clear photographs of each damaged area from multiple angles
- Close-up shots of individual imperfections
- Any additional notes or observations
This checklist can streamline the documentation process and ensure you capture all relevant details of the car wrap damage.
Types of Car Wrap Damage
Vinyl car wraps in Danbury, CT, are popular for vehicle customization and branding, offering a unique and eye-catching appearance while protecting the underlying paintwork.
However, car wraps are not immune to damage like any exterior automotive feature. Car wrap installers like Car Wrap – Illmatic Wraps CT can help you deal with these damages in the best way possible.
-
Surface Scratches and Scuffs
Surface scratches and scuffs are among the most common forms of damage that car wraps can encounter. While car wraps are designed to be durable and resilient, they can still suffer from minor abrasions due to various factors, including road debris, improper cleaning methods, and everyday wear and tear. Understanding the causes and characteristics of surface scratches and scuffs is crucial for maintaining the visual appeal of your car wrap.
Causes of Surface Damage
Surface scratches and scuffs on your car wrap can result from several factors, including:
- Road Debris: Small stones, gravel, and other debris kicked up by other vehicles can impact your car wrap and cause surface damage.
- Improper Cleaning: Using harsh or abrasive cleaning products, such as abrasive sponges or brushes, can lead to scratches and scuffs.
- Parking Incidents: Minor contact with objects in parking lots, such as shopping carts or bushes, can leave behind surface blemishes.
- Natural Wear and Tear: Over time, exposure to the elements, such as sunlight and rain, can contribute to the development of fine scratches.
Identifying Surface Scratches and Scuffs
Recognizing surface scratches and scuffs on your car wrap is essential for addressing them promptly. Here are some indicators of this type of damage:
- Superficial Marks: Surface scratches are typically shallow and don’t penetrate the vinyl wrap’s layers.
- Gloss Variation: Scratches and scuffs may cause localized differences in the glossiness of the wrap.
- Visual Inspection: A close visual inspection under proper lighting conditions can reveal these imperfections.
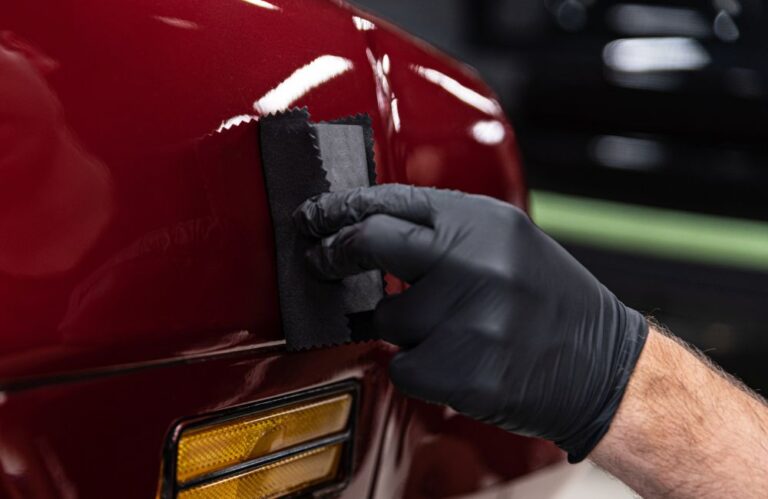
Repairing Surface Scratches and Scuffs
Want to know how to fix vinyl wrap scratches? Repairing surface scratches and scuffs on your car wrap can help maintain its pristine appearance. There are several methods you can use to address this type of damage:
- Cleaning the Damaged Area: Before attempting any repairs, clean the affected area. Use a mild, automotive-specific detergent and a soft microfiber cloth to gently remove dirt and contaminants from the scratch or scuff.
- Heat Gun or Hair Dryer Method: For minor scratches and scuffs, you can use a heat gun or a hair dryer set on low heat to soften the vinyl. Once the vinyl becomes pliable, gently massage the affected area with your fingertips to smooth out the imperfections. Be cautious not to overheat the vinyl, as excessive heat can cause further damage.
- Using Car Wrap Repair Kits: Car wrap repair kits are commercially available and can provide a more structured approach to addressing surface damage. These kits typically include vinyl filler, adhesive, and application tools. Follow the manufacturer’s instructions carefully to achieve the best results.
It’s important to note that while surface scratches and scuffs can often be repaired effectively, more severe damage may require professional attention. In such cases, seeking the expertise of a professional car wrap installer or repair specialist is advisable to ensure a seamless restoration of your car wrap’s appearance.
-
Tears and Punctures
Tears and punctures represent more severe car wrap damage than surface scratches and scuffs. These types of damage are typically caused by accidents, vandalism, or contact with sharp objects. While tears and punctures can be visually distressing, addressing them promptly is essential to prevent further deterioration and protect the underlying paintwork.
Common Causes of Tears and Punctures
Tears and punctures on car wraps can occur due to various reasons, including:
- Accidents: Collisions or accidents can result in tears or punctures in the car wrap, particularly if the impact is significant.
- Vandalism: Deliberate vandalism, such as keying or piercing the wrap with sharp objects, can cause extensive damage.
- Contact with Sharp Objects: Contact with sharp objects like branches, tools, or debris can lead to punctures or tears, especially if the object has enough force or a sharp edge.
- Wear and Tear: Over time, the edges of the car wrap can become vulnerable to fraying, which may eventually lead to tears.
Recognizing Tear and Puncture Damage
Identifying tears and punctures on your car wrap is typically straightforward, as the damage is often visible and can vary in size and shape. Here are some key indicators of this type of damage:
- Visible Tears: Tears are characterized by a clear separation or gap in the car wrap material. They range from small, barely noticeable tears to more extensive, glaring ones.
- Puncture Holes: Punctures typically leave behind small, circular, or irregularly shaped holes in the wrap. The edges of the holes may appear stretched or torn.
- Torn Edges: Sometimes, a tear may begin at the edge of the wrap and extend inward. Torn or frayed edges are also signs of impending or existing damage.
Treatment Options for Tears and Punctures
Addressing tears and punctures in your car wrap requires a more involved repair process than surface scratches and scuffs. Here’s a step-by-step guide to repairing this type of damage:
- Cleaning the Affected Area: Begin by thoroughly cleaning the area around the tear or puncture. Use a mild detergent and a clean, lint-free cloth to remove dirt or debris.
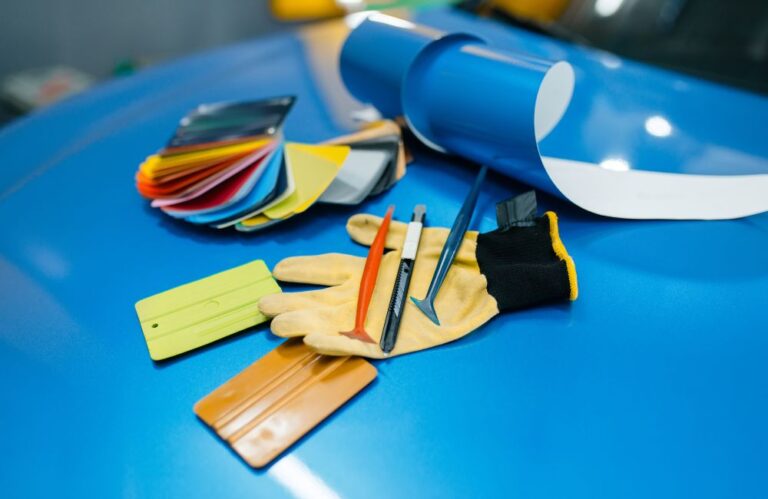
- Patching with Vinyl Material: You’ll need a piece of matching vinyl material to repair the damage. This material can typically be obtained from the original car wrap supplier or manufacturer. Cut a piece of vinyl slightly larger than the damaged area.
- Application of Vinyl Patch: Carefully position the vinyl patch over the tear or puncture, ensuring it overlaps the damaged area by at least half an inch on all sides. Smooth out any air bubbles or wrinkles by applying gentle pressure.
- Adhesive Application: Apply a high-quality adhesive or bonding agent to the underside of the patch and the surrounding wrap area. Press the patch firmly onto the wrap, making sure it adheres securely.
- Trimming Excess Material: Trash any excess vinyl material using a sharp utility knife or scissors once the adhesive has dried. Be precise in your cutting to ensure a seamless repair.
- Heat Application: Use a heat gun or hair dryer on low heat to warm the patched area gently. This helps the vinyl bond and conform to the vehicle’s contours. Use a soft cloth or squeegee to smooth out any remaining imperfections.
- Final Inspection: After the car vinyl repair has dried and settled, inspect the patched area for any remaining irregularities or air bubbles. Repeat the heating and smoothing process until the repair is virtually invisible.
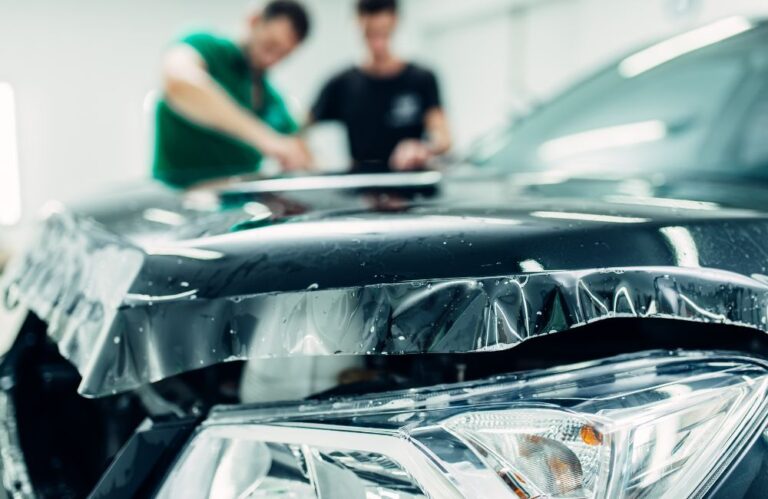
While the above steps provide a general guideline for repairing tears and punctures, it’s worth noting that complex or extensive damage may require professional attention. Professional car wrap installers like Car Wrap – Illmatic Wraps CT have the experience and tools to handle intricate repairs, ensuring a seamless and durable restoration of your car wrap’s integrity.
Protecting Your Vinyl Car Wrap
Protecting your vinyl car wrap is essential for preserving its appearance and longevity. While car wraps in Danbury, CT, are designed to withstand the elements, proper care and maintenance can significantly extend their lifespan and keep your vehicle looking pristine.
Protective Coatings
Applying protective coatings to your vinyl car wrap is an excellent way to safeguard it against environmental factors, contaminants, and the wear and tear of daily use. These coatings create a protective barrier that enhances the wrap’s durability and makes it easier to maintain.
Benefits of Protective Coatings
- Enhanced Durability: Protective coatings for vinyl car repair provide an extra layer of protection against scratches, UV rays, and harsh weather conditions, ensuring your car wrap remains in optimal condition.
- Ease of Cleaning: Coated wraps are easier to clean because contaminants and dirt are less likely to adhere to the surface. This reduces the effort required for routine maintenance.
- UV Protection: Many protective coatings offer UV protection, which helps prevent fading and discoloration of the car wrap due to prolonged sun exposure.
- Extended Lifespan: By minimizing wear and tear, protective coatings can extend the lifespan of your vinyl car wrap, preserving its appearance for years to come.
Regular Maintenance Routine
Establishing a regular maintenance routine is crucial for the ongoing care of your vinyl car wrap. By incorporating the following practices into your maintenance regimen, you can keep your car wrap looking its best:
Cleaning and Washing Tips
- Use a Mild Detergent: When cleaning your car wrap, use a mild automotive-specific detergent and warm water. Avoid harsh or abrasive cleaners, as they can damage the wrap.
- Soft Microfiber Cloth: Opt for a soft microfiber cloth or a sponge with a smooth surface to wash the wrap. These materials are gentle on the vinyl and reduce the risk of scratches.
- Avoid High-Pressure Washers: While pressure washers can be convenient for cleaning, they should be used cautiously. High-pressure water jets can damage the car wrap, so maintain a safe distance and use low pressure.
- Rinse Thoroughly: Ensure thorough rinsing after washing to remove all traces of soap and contaminants.
Frequency of Maintenance
- Regular Washing: Depending on your location and driving conditions, plan to wash your car wrap regularly. This might range from weekly to monthly, but removing dirt and contaminants is essential.
- Immediate Cleanup: If your car wrap encounters substances like bird droppings, tree sap, or insect residue, clean them off immediately. These can be acidic and harm the vinyl if left unattended.
- Seasonal Considerations: Adjust your maintenance routine based on seasonal changes. For example, winter might require frequent cleaning to remove salt and road debris.
Protect Your Car Wrap for Long-Lasting Brilliance With Reliable Installers
As you embark on your journey to protect your car wrap, consider the professionals at Car Wrap – Illmatic Wraps CT. Our expert installers make us an excellent choice for all your car wrap needs. Don’t miss the opportunity to ensure that your vehicle continues to turn heads and make a statement with its stunning car wrap. Contact us today and let your car wrap shine!