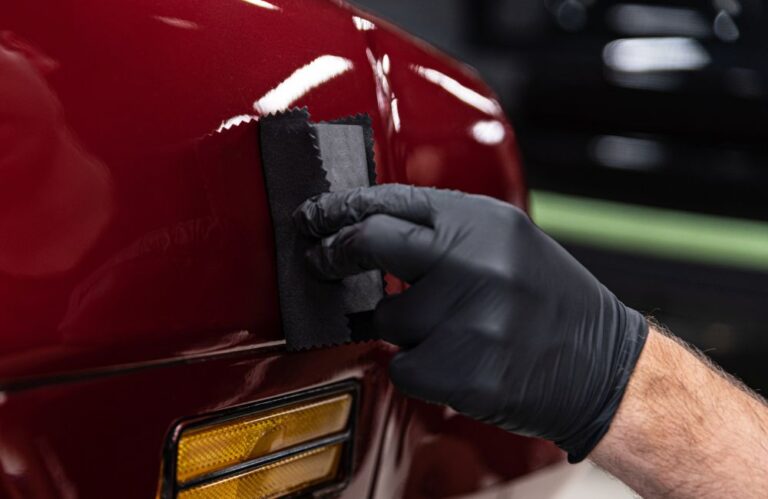
Vinyl wrapping has become a go-to choice for car enthusiasts looking to elevate their vehicle’s aesthetics while protecting the original paint. The allure of vinyl wraps lies in their cost-effectiveness, versatility, and endless customization options. However, diving into DIY vinyl wrapping without proper knowledge can lead to costly mistakes and a car that looks worse than before. Explore our guide for the best DIY vinyl wrap materials and techniques for achieving a professional-grade finish. We’ll explore the seven most common DIY vinyl wrap mistakes that XPEL PPF experts warn can ruin your car’s appearance. With their invaluable insights, you’ll learn how to avoid these pitfalls and achieve a stunning, professionally wrapped vehicle.
If you’re searching for XPEL PPF experts in New York, New York, consider exploring nearby professionals like Car Wrap – Illmatic Wraps (NYC) for your car wrap needs. Rely on their expertise to steer clear of any potential car wrap issues that could negatively impact your vehicle’s aesthetics.
1. Neglecting Proper Surface Preparation
When embarking on a DIY vinyl wrapping project, it’s easy to get caught up in the excitement of choosing colors and envisioning your car’s new look. However, XPEL PPF experts advise that the most crucial step often lies in the less glamorous side of the surface preparation process. Neglecting this fundamental aspect can lead to a cascade of problems that compromise the overall appearance of your vehicle.
Importance of a Pristine Canvas
Before diving into the world of vinyl wrapping, your car’s surface must be as clean as a blank canvas awaiting a masterpiece. XPEL PPF experts emphasize that thorough surface preparation sets the foundation for a successful wrap installation. Here’s why it matters:
Ensuring Proper Adhesion
- Optimal Adhesive Bond
A clean surface allows the adhesive on the vinyl wrap to form a strong and lasting bond with your car’s paint. This bond is essential to prevent the wrap from peeling or lifting over time.
- Avoiding Surface Contaminants
Even the tiniest dust, grease, or residue can disrupt adhesion. XPEL PPF experts recommend removing all contaminants to ensure a smooth, bubble-free finish.
Proper Surface Preparation Steps
Achieving a pristine surface isn’t as complicated as it may seem. XPEL PPF experts offer these straightforward steps to ensure your canvas is spotless:
Thorough Cleaning
- Wash and Rinse
Start with a thorough car wash to remove dirt, grime, and loose debris. Use a gentle automotive shampoo and rinse the car thoroughly.
- Degreasing
Grease and oil residues can be stubborn, so use a dedicated automotive degreaser to eliminate them. Pay attention to areas like the engine bay and wheel wells.
Clay Bar Magic
- Using a Clay Bar
XPEL PPF experts swear by the clay bar technique to remove embedded contaminants. Simply lubricate the surface with a clay bar lubricant and glide the clay bar over the paint to pick up impurities.
Drying the Surface
- Complete Drying
Ensure the car’s surface is dry before proceeding with the vinyl wrap installation. Water trapped beneath the vinyl can lead to adhesive failure.
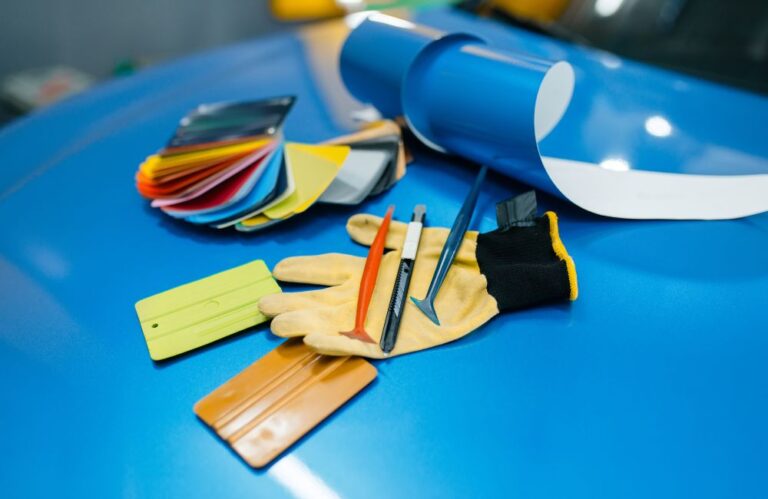
2. Skimping on Essential Tools and Equipment
When it comes to DIY vinyl wrapping, having the right tools at your disposal can make all the difference between a professional-looking finish and a subpar job. XPEL PPF experts emphasize the critical role that quality tools and equipment play in ensuring a successful vinyl wrap installation.
Why Quality Tools Matter
Cutting corners by using substandard tools may seem like a way to save money, but it often leads to frustration and disappointing results. Embarking on a DIY car wrap vinyl project can save you money while allowing for a personalized touch to your vehicle’s appearance. If you’re attempting vinyl wrapping for the first time, our step-by-step tutorial will guide you through the process seamlessly. XPEL PPF experts highlight the importance of investing in high-quality tools and equipment for the following reasons:
Ensuring Precise Application
- Sharp Cutting Tools
A sharp utility knife or specialized vinyl cutting tools are essential for making clean and precise cuts during the installation process. Dull blades can result in jagged edges and uneven seams.
- Quality Heat Gun
A high-quality heat gun is indispensable for stretching and molding the vinyl wrap to fit complex contours. It ensures even heating, preventing overheating that can damage the material.
Minimizing Installation Challenges
- Efficient Squeegee
Using a squeegee with a felt or fabric edge aids in smoothing out the vinyl, eliminating air bubbles, and preventing surface scratches. Low-quality squeegees can leave marks and imperfections on the wrap.
- Safety and Precision
Quality tools not only ensure better results but also enhance safety. They provide better control and reduce the risk of accidents during the installation process.
High-Quality Tools and Equipment
Investing in a high-quality car wrapping kit simplifies the process, making it easier to achieve impressive results while protecting your vehicle’s original finish. To achieve a professional-looking vinyl wrap, XPEL PPF experts suggest considering the following tools and equipment:
High-Quality Cutting Tools
- Invest in a reliable utility knife
Look for a knife with a sharp, replaceable blade for clean and precise cuts.
- Specialized vinyl cutting tools
Consider tools designed specifically for vinyl wrap applications, such as rotary cutters or precision trimmers.
Professional Heat Gun
- Choose a reputable heat gun
Opt for a heat gun from a trusted brand known for its even heat distribution and temperature control. Understanding vinyl wrap glue properties is crucial for ensuring a secure and long-lasting bond during your car wrapping project.
- Variable heat settings
Look for a heat gun with adjustable temperature settings to suit different vinyl types and installation conditions.
Quality Squeegee
- Felt or fabric edge
Ensure the squeegee you choose has a felt or fabric edge to prevent scratches and scuffs on the vinyl surface.
- Ergonomic handle
A comfortable and ergonomic handle design makes the application process more manageable.
3. Cutting Corners with Improper Cutting and Trimming
In the world of vinyl wrapping, precision is king. When it comes to cutting and trimming the vinyl, there’s no room for error. XPEL PPF experts stress that improper cutting and trimming can quickly turn your DIY vinyl wrap project into a visual disaster. Here’s why it’s essential to get it right:
Significance of Precision
Cutting and trimming may seem straightforward, but they are critical steps in achieving a clean and professional-looking finish. XPEL PPF experts emphasize that precision in these areas is vital for the following reasons:
Ensuring Seamless Edges and Seams
- Professional Appearance
Clean, well-executed cuts ensure that your vinyl wrap looks like it was applied by a pro, with no visible edges or seams.
- Preventing Lifted Edges
Poorly cut edges are more prone to lifting over time, which can lead to premature wear and an unsightly appearance.
Achieving Clean and Precise Cuts
To master the art of cutting and trimming during your vinyl wrap installation, follow these active and straightforward subpoints:
Measure Twice, Cut Once
- Accurate Measurements
Always measure twice and double-check your measurements before making any cuts. Precision starts with accurate dimensions.
- Use a Cutting Mat
Lay your vinyl on a cutting mat to protect your work surface and ensure straight, clean cuts.
Employ the Right Tools
- Sharp Blades
Ensure your cutting tools have sharp blades. Dull blades can lead to jagged, uneven cuts that are challenging to rectify.
- Fine-Tipped Blades
For intricate cuts and curves, a fine-tipped blade or precision trimmer can be your best friend.
Gradual, Controlled Cutting
- Cut Gradually
Instead of forcing the blade through the vinyl, make gradual, controlled cuts. This minimizes the risk of slip-ups.
- Practice Patience
Rushing through the cutting process can lead to mistakes. Take your time, especially when working on complex sections.
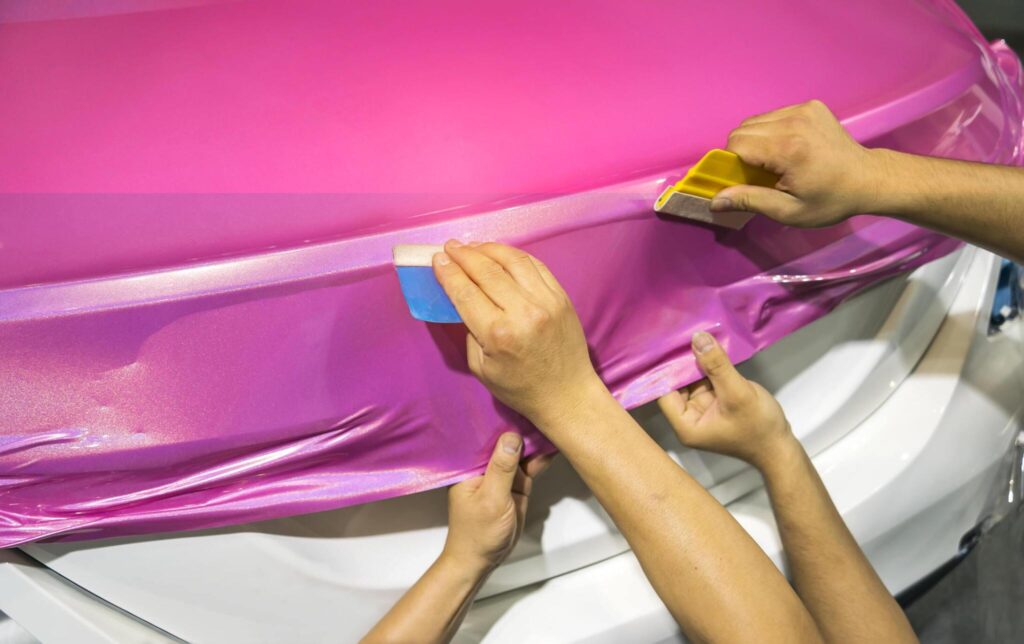
4. Stretching the Limits with Incorrect Stretching Techniques
When it comes to vinyl wrapping, achieving the perfect fit around your vehicle’s curves and contours is a must. However, XPEL PPF experts warn against the common mistake of stretching the vinyl incorrectly. Improper stretching techniques can lead to wrinkles, bubbles, and a less-than-desirable finish. Here’s why getting the stretch right matters:
Need for Proper Stretching
XPEL PPF experts emphasize that stretching is a crucial aspect of vinyl wrap installation. Correct stretching techniques are essential for the following reasons:
Ensuring a Smooth and Seamless Look
- Wrinkle-Free Appearance
Proper stretching ensures that the vinyl adheres smoothly to the surface, leaving no unsightly wrinkles or creases.
- Avoiding Distortions
Incorrect stretching can distort the design or pattern on the vinyl, ruining the intended look.
Correct Stretching Techniques
Achieving the right stretch doesn’t have to be a daunting task. Follow these active and practical subpoints endorsed by XPEL PPF experts:
Even Heating
- Heat the vinyl
Before stretching, use a heat gun to evenly heat the vinyl. This softens the material and makes it more pliable for stretching.
- Avoid Overheating
Be cautious not to overheat the vinyl, as this can damage the material. Keep the heat gun moving and maintain a safe distance.
Gradual Stretching
- Stretch Gradually
Apply gentle, even pressure while stretching the vinyl. Avoid sudden and forceful tugging, which can lead to tears or deformities.
- Work in Sections
Divide larger sections into smaller areas for more controlled stretching. This helps maintain uniform tension.
Pay Attention to Complex Curves
- Heat and Mold
For areas with complex curves and contours, such as bumpers and mirrors, use heat to mold the vinyl into shape. Patience is key here.
- Stretching Aids
Sometimes, using additional stretching aids like magnets or soft squeegees can help in achieving the desired fit.

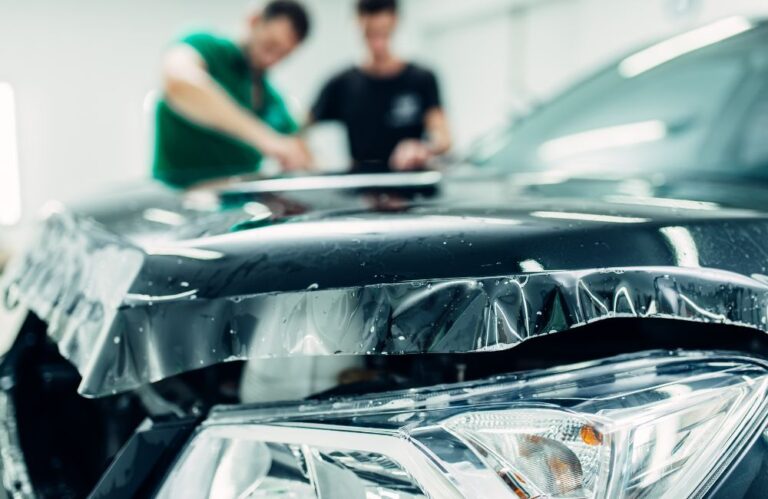
5. Falling Victim to Bubbles and Air Pockets
In the world of DIY vinyl wrapping, one of the most frustrating pitfalls is the occurrence of bubbles and air pockets. XPEL PPF experts underscore the importance of addressing this common issue, as it not only detracts from the visual appeal of your vehicle but also threatens the durability of the wrap. Here’s why you should steer clear of these unsightly imperfections:
Bubble Trouble
XPEL PPF experts caution that bubbles and air pockets are more than just cosmetic nuisances; they pose several potential problems:
Compromising Adhesion
- Weakened Bond
Bubbles and air pockets can weaken the adhesive bond between the vinyl and your car’s surface, leading to peeling or lifting.
- Uneven Finish
They result in an uneven finish, marring the otherwise sleek appearance of your vinyl wrap.
Preventing and Addressing Bubbles and Air Pockets
Dealing with bubbles and air pockets requires a hands-on approach and a bit of patience. Here are active and effective subpoints endorsed by XPEL PPF experts:
Starting from the Center
- Center-Out Approach
Begin applying the vinyl wrap from the center of the panel and work your way outward. This method helps push air out as you go. - Use a Squeegee
Employ a squeegee to gently press the vinyl onto the surface, smoothing out any air trapped beneath.
Even Pressure and Smooth Movements
- Consistent Pressure
Maintain even pressure with the squeegee as you work. Avoid applying too much force, which can create new bubbles.
- Smooth, Unidirectional Strokes
Use smooth and unidirectional strokes with the squeegee to ensure air is expelled and the vinyl adheres properly.
Puncturing and Repairing Bubbles
- Puncture Method
For stubborn bubbles, gently puncture them with a pin or needle. Then, use the squeegee to press out the air and flatten the vinyl. - Apply Heat
In some cases, applying heat with a heat gun over the bubble can make it easier to manipulate and remove.
When in need of XPEL PPF experts in NY, NY, it’s wise to explore local specialists like Car Wrap – Illmatic Wraps (NYC) for your car wrap project. Trust their proficiency to help you avoid any pitfalls that may compromise your car’s appearance.
6. Overlooking Post-Installation Care
Once the vinyl wrap is beautifully applied to your car, it’s tempting to hit the road and show off your newly transformed vehicle. However, XPEL PPF experts stress that neglecting proper post-installation care can have adverse consequences. To keep your car’s appearance pristine and ensure the longevity of your vinyl wrap, it’s crucial to follow a post-installation care routine. Here’s why it matters:
Importance of Post-Installation Care
XPEL PPF experts highlight that post-installation care is the final step in achieving a durable and appealing vinyl wrap. Ignoring this step can lead to various issues:
Protecting the Finish
- Preserving the Look
Proper care ensures that your vinyl wrap maintains its vibrant colors and glossy finish over time, enhancing the overall aesthetics of your vehicle.
- Shielding from Damage
Post-installation care safeguards the vinyl wrap from environmental factors, preventing stains, fading, and deterioration.
Recommended Post-Installation Care
Taking care of your vinyl wrap doesn’t require a massive effort, but consistency is key. Follow these active and straightforward subpoints endorsed by XPEL PPF experts:
Initial Waiting Period
- Avoid Washing
After the vinyl wrap is installed, refrain from washing your car for at least 48 hours. This allows the adhesive to set properly.
Gentle Cleaning
- Use the Right Products
Opt for a pH-balanced automotive shampoo that is gentle on the vinyl wrap. Harsh detergents can damage the material.
- Microfiber Towels
Use soft, microfiber towels for cleaning to prevent scratches or abrasions on the wrap.
Protective Sealants
- Apply Vinyl-Specific Sealants
Consider applying a vinyl-specific protective sealant to enhance the wrap’s longevity and protect it from UV rays.
- Regular Reapplication
Depending on the product, reapply the sealant as recommended to maintain its protective properties.
Avoid Harsh Chemicals
- Avoid Solvents and Abrasives
Stay away from solvents, abrasive cleaners, and harsh chemicals, as they can damage the vinyl.
- Spot Cleaning
Address any localized stains or contaminants promptly with gentle cleaning methods.
Protection from the Elements
- Garage Parking
Whenever possible, park your car in a garage or shaded area to shield it from direct sunlight and extreme weather conditions.
- Use Car Covers
If parking indoors isn’t an option, use a car cover to protect the vinyl wrap from dust, debris, and the elements.
7. Settling for Low-Quality Vinyl Wraps
In the pursuit of a unique and eye-catching vehicle transformation, one mistake that XPEL PPF experts strongly caution against is choosing low-quality vinyl wraps. The quality of the vinyl material itself can significantly impact the final outcome of your DIY vinyl wrap project. Here’s why opting for subpar wraps is a mistake you should avoid:
Consequences of Low-Quality Vinyl Wraps
XPEL PPF experts emphasize that your choice of vinyl wrap material goes beyond aesthetics; it also influences performance and durability. Settling for low-quality wraps can lead to various issues:
Compromising Appearance and Durability
- Premature Fading
Low-quality vinyl wraps are more susceptible to fading, which can make your car’s appearance deteriorate quickly.
- Inferior Adhesion
The adhesive on subpar wraps may not hold up well, leading to peeling, lifting, or the need for frequent reinstallation.
For those in search of XPEL PPF experts in New York, New York, look no further than nearby professionals such as Car Wrap – Illmatic Wraps (NYC) for your car wrap requirements. Their expertise can safeguard your car’s appearance by steering clear of any potential pitfalls associated with the process.
Selecting the Best Vinyl Wrap
To ensure a successful and long-lasting vinyl wrap installation, XPEL PPF experts recommend being discerning when choosing your vinyl material. Here are active and practical subpoints to consider:
Reputable Brands
- Trustworthy Manufacturers
Opt for vinyl wraps from reputable manufacturers known for their quality and commitment to durability.
- Seek Recommendations
Consult with experts or fellow enthusiasts for recommendations on trusted brands.
Material Characteristics
- Vinyl Thickness
Pay attention to the thickness of the vinyl. Thicker vinyl is generally more durable and forgiving during installation.
- Adhesive Strength
Ensure that the adhesive backing of the vinyl is robust and designed for automotive use.
UV Resistance
- UV Protection
Look for vinyl wraps with UV-resistant properties to prevent color fading and deterioration from sun exposure.
- Longevity
High-quality vinyl wraps are designed to maintain their appearance for years, even under harsh UV conditions.
Customization Options
- Variety of Finishes
Consider the range of finishes and colors offered by the manufacturer to achieve your desired look.
- Pattern Matching
High-quality wraps often provide better pattern matching, which results in a more seamless appearance.
Transform Your Ride Today with XPEL PPF Experts!
Ready to give your car a makeover? Trust in the expertise of Car Wrap – Illmatic Wraps (NYC) — the top destination for vinyl car wraps. Our skilled team will take your vehicle’s appearance to the next level, ensuring a flawless finish that turns heads on the streets. Don’t settle for less; choose Car Wrap – Illmatic Wraps (NYC) and experience the transformation your car deserves. Contact us today for a consultation!